
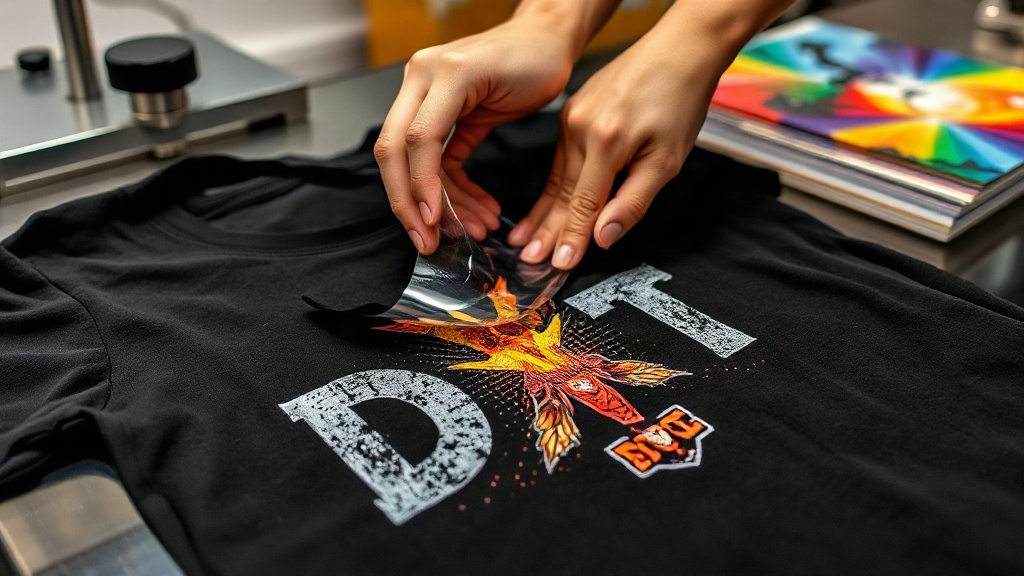
Imagine pressing a vibrant, full-color design onto a cotton t-shirt in under a minute, with no weeding, no color limitations, and no special pretreatment. That's the promise of DTF transfers, a technology that's rapidly become a favorite for small businesses, crafters, and print shops alike. Unlike vinyl or screen printing, DTF (direct-to-film) opens up a world of possibilities for intricate details, gradients, and photographic images on almost any fabric. But to get professional results, you need to understand the process from start to finish. This guide walks you through everything: how DTF works, what you need, how to apply transfers correctly, and how to make them last.
What Are DTF Transfers and How Do They Work?
DTF transfers are printed designs on a special film that can be heat-pressed onto fabrics. The process begins with a digital printer that lays down CMYK inks plus white ink onto a PET film. The white ink acts as a base, allowing the colors to pop on both light and dark garments. While the ink is still wet, a hot-melt adhesive powder is applied, then cured. The result is a flexible, stretchable transfer that can be stored and applied later.
When you're ready to apply, you simply place the transfer on your garment, cover it with a heat press or iron, and press for a short time. The adhesive melts and bonds with the fabric fibers. After cooling, you peel away the film, leaving a soft, vibrant print. Because the design is printed digitally, there's no setup cost for additional colors, making short runs and one-offs economical.
Why Choose DTF Over Other Printing Methods?
DTF has several advantages that make it stand out:
- No color limits: Print gradients, photos, and fine details without extra cost.
- Works on many fabrics: Cotton, polyester, blends, and even some treated leathers.
- No weeding: Unlike vinyl, there's no cutting or weeding required.
- Durable: Properly applied DTF prints resist cracking and fading.
- Fast turnaround: From design to finished product in minutes.
However, DTF isn't perfect for every situation. It may not be ideal for stretchy activewear that undergoes extreme elongation, and the hand feel is slightly thicker than screen printing. But for most custom apparel, it's a versatile and cost-effective choice.
Materials and Equipment You'll Need
To get started with DTF, you'll need:
- A DTF printer (or access to a service that prints transfers).
- DTF film (PET film).
- DTF ink (CMYK + white).
- Hot-melt adhesive powder.
- A heat press or iron.
- Heat-resistant tape (optional).
- Parchment paper or a Teflon sheet.
If you're not ready to invest in a printer, many companies sell ready-to-press DTF transfers, allowing you to focus on application and selling.
Step-by-Step Guide to Applying DTF Transfers
Applying a DTF transfer is straightforward, but following the right steps ensures a lasting bond.
1. Prepare Your Workspace
Set up your heat press on a sturdy surface. Ensure it's clean and free of debris. Preheat your press to the recommended temperature, usually between 325°F and 375°F (160°C–190°C).
2. Preheat the Garment
Place your garment on the press and preheat for 5–10 seconds. This removes moisture and wrinkles, creating a smooth surface for the transfer.
3. Position the Transfer
Place the DTF transfer face-down on the garment. The printed side should touch the fabric. If needed, secure it with heat-resistant tape to prevent shifting.
4. Press
Cover with parchment paper or a Teflon sheet. Press with medium to firm pressure for 10–15 seconds. The exact time depends on your press and transfer. Always test with a sample first.
5. Peel
After pressing, let the transfer cool completely before peeling. This is a "cold peel" process. Slowly peel the film from one corner. If the design lifts, press again for a few seconds.
6. Post-Press (Optional)
For extra durability, cover the design with parchment and press again for 5–10 seconds. This helps the adhesive fully set.
Common Mistakes and How to Avoid Them
Even experienced crafters can run into issues. Here are common pitfalls:
- Insufficient pressure: Leads to poor adhesion. Adjust your press accordingly.
- Wrong temperature: Too low and the adhesive won't melt; too high and the film may scorch.
- Peeling too soon: Always wait for the transfer to cool.
- Not preheating: Moisture can cause bubbling and weak bonds.
- Using the wrong fabric: Some fabrics like nylon or coated materials may not work well.
Always do a test press on a scrap piece of fabric to dial in your settings.
Caring for Your DTF Prints
To keep your DTF transfers looking great, follow these care instructions:
- Wait 24 hours before washing.
- Turn the garment inside out.
- Machine wash cold, gentle cycle.
- Use mild detergent, no bleach or fabric softener.
- Tumble dry low or hang dry.
- Iron inside out, never directly on the print.
With proper care, DTF prints can last as long as the garment itself.
Frequently Asked Questions About DTF Transfers
Can I apply DTF transfers with a regular iron?
Yes, but it's trickier. You'll need to apply firm pressure and may need to press longer. A heat press is recommended for consistent results.
Do DTF transfers work on dark colors?
Absolutely. The white ink base makes colors vibrant on both light and dark fabrics.
How long do DTF transfers last?
With proper application and care, they can last 50+ washes or more, often outlasting the garment.
Can I stretch DTF prints?
DTF transfers have some stretch, but they're not ideal for highly elastic fabrics. For stretchy materials, consider a transfer with more elasticity or a different method.
What's the difference between DTF and DTG?
DTG (direct-to-garment) prints directly onto the fabric, while DTF prints onto a film first. DTF allows for more flexibility in fabric choice and often has a softer feel.
DTF transfers are a game-changer for custom apparel. With the right knowledge and a bit of practice, you can produce professional-quality prints that impress customers and keep them coming back. Whether you're a hobbyist or a growing business, mastering DTF opens up a world of creative and profitable opportunities.