
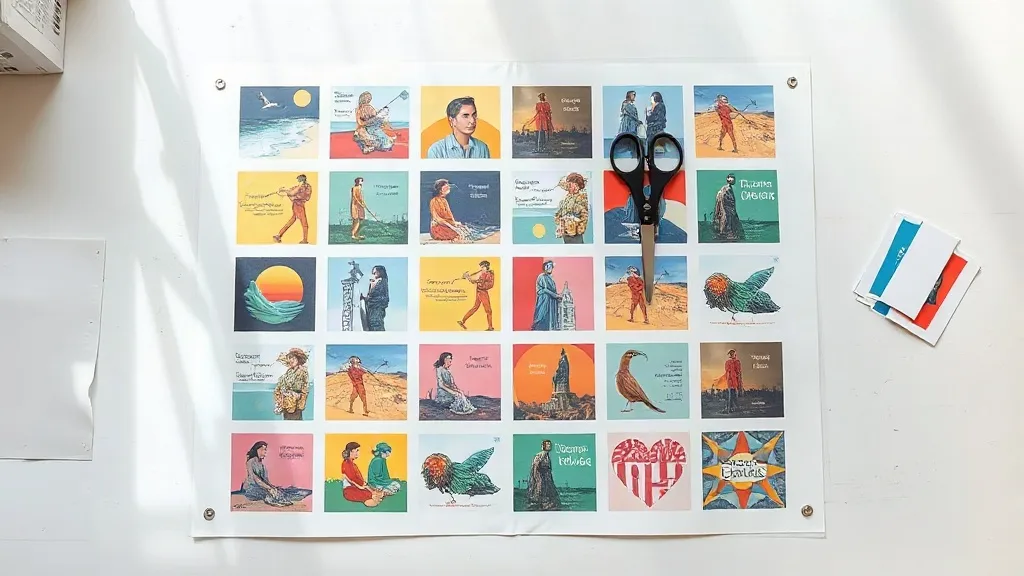
Most people who get into dtf transfers start the same way: one design, one sheet, one shirt. It works, the print looks great, and then a customer asks for twelve shirts in four sizes with three different logos. Suddenly the single-sheet workflow that felt so clean becomes a slow, expensive habit. The fix is not a better printer or a fancier powder. It is the gang sheet, the layout decision that quietly determines how much film you burn, how fast you press, and whether the job actually earns money.
This guide is about that layout decision. Not the printer settings, not the powder debate, but the part of dtf production that happens on screen before anything prints: how you arrange multiple designs on one sheet so that the film, the powder, and your time all go further.
What a Gang Sheet Actually Is
A gang sheet is a single sheet of DTF film holding several designs at once, arranged to use as much of the printable area as possible. Instead of printing a 3-inch logo on a 13 by 19 inch sheet and trimming away the rest, you place that logo next to a name, a sleeve print, a back graphic, and a few spare sizes, then print the whole group in one pass.
The term comes from gang printing in offset and screen work, where unrelated jobs share one press run to split setup costs. DTF works on the same logic. Every sheet you send through the printer carries fixed costs: film, ink, powder, cure time, and the operator minutes to handle it. A gang sheet spreads those fixed costs across every design on the sheet, so the per-print cost drops sharply as you fill the area.
Why it matters more in DTF than in other methods
With vinyl, leftover material rolls back up and waits for the next job. DTF film does not work that way. Once a sheet is printed, powdered, and cured, the unused white space is wasted material you paid for. That is the core argument for ganging: empty film is money you already spent.
Building a Layout That Fits Real Garments
The mistake I see most often is treating the gang sheet like a puzzle where the goal is zero gaps. Fit is not the only constraint. You also need enough space to trim cleanly and enough margin that the powder station does not contaminate neighboring designs.
Start with the largest design, then fill
Place your biggest graphic first, usually a full back print, and anchor it to one corner. Large designs dictate the remaining geometry. Once that block is set, fill the leftover strips with smaller items: left chest logos, sleeve prints, name tags, and size runs of the same artwork. Small pieces are the easiest to rearrange, so save them for last.
Leave a trim gutter, not a hairline gap
Aim for roughly 5 to 8 mm between designs. Less than that and your scissors or cutter drift into the neighboring print, and the powder applied to one design can dust the edge of the next. A visible gutter also makes the trimming step faster because you are not hunting for the boundary.
Keep orientation consistent
Rotate designs only when the artwork allows it. Mixed orientations look efficient on screen but slow down trimming and pressing, because the operator has to reorient each piece mentally before placing it on the shirt. Consistent orientation is worth a little wasted film.
Matching Sheet Size to Order Size
Gang sheets are not automatically better. A sheet built for a 40-piece run makes no sense for a single custom shirt, and a small sheet packed for a two-shirt order wastes the setup time. The right size depends on how many pieces share the same film.
- One-off custom orders: print a single design on a small sheet. Ganging adds handling without saving anything.
- Small runs of 5 to 15 pieces: a mid-size sheet with repeated sizes of one or two designs usually wins.
- Team and event orders: full sheets with names, numbers, and logos packed together cut film cost per piece dramatically.
- Sample and test prints: dedicate a corner of a production sheet rather than running a separate pass.
A useful habit is to keep a running list of small jobs that are waiting. When a big order comes in, fill the leftover space with those queued items instead of letting the sheet run half empty. This is how shops keep film utilization high without printing speculative inventory.
The Powder and Cure Trap on Dense Sheets
Here is where ganging quietly causes quality problems. A sheet packed edge to edge has a lot of wet ink and a lot of adhesive to manage in one pass. If you shake powder across the whole sheet the way you would a single design, you get uneven coverage and thick patches where powder piles up between designs.
Two habits help. First, apply powder in sections rather than one sweep, lifting and tilting the sheet so excess adhesive falls away from the printed areas instead of settling in the gutters. Second, cure with the sheet flat and give dense areas a few extra seconds. A crowded sheet holds more heat mass than a sparse one, and the middle can lag behind the edges.
If you notice powder sticking to the film between designs, that is a sign you are over-applying. Those stray granules transfer to the press and leave a faint haze on the garment, which customers notice immediately even if they cannot name the cause.
Pressing a Gang Sheet Without Guesswork
Once trimmed, each piece from the gang sheet presses like any other transfer, but the workflow changes. Because you cut many pieces at once, staging matters. Sort trimmed pieces by garment and size before you start pressing, so the press is never idle while you search for the right logo.
A simple staging routine
- Trim the full sheet and stack pieces by design, not by position on the sheet.
- Pre-press each garment for a few seconds to remove moisture.
- Press the largest design first, then work down to small pieces.
- Peel warm or cold according to your film, and keep the peel direction consistent.
- Do a quick rub test on the first piece before committing the rest of the run.
That rub test is worth the thirty seconds. Gang sheets sometimes hide a weak area in a dense cluster, and catching it on piece one saves you from reprinting a dozen shirts.
Pricing Gang Sheets So the Savings Show Up
Ganging lowers your cost per print, but that only helps if your pricing reflects it. Many small shops price every job as if it were a single-sheet job, which means the customer pays for film you never used and you leave margin on the table without realizing it.
A workable approach is to calculate a cost per square inch of film, including ink, powder, and a share of the cure time, then price each design by its footprint plus a handling charge. The handling charge covers trimming and staging, which are real labor even though they produce no printed output. When a customer asks about dtf transfers near me, the answer that wins the job is usually a clear per-piece price that already accounts for efficient layout, not a vague quote that hides the film cost.
Where the margin actually hides
The biggest savings rarely come from the largest design. They come from the small pieces: sleeve logos, name tags, and size markers that fill leftover strips. Those items cost almost nothing in film when they ride along on a sheet that was printing anyway, yet customers happily pay a normal per-piece rate for them. Track how much of each sheet is filled with small add-ons and you will see where the profit lives.
When Ganging Hurts More Than It Helps
There are cases where packing a sheet is the wrong call. Rush orders that need one design immediately should not wait for a sheet to fill. Complex artwork with fine detail can suffer when squeezed into a crowded layout, because trimming close to delicate edges raises the risk of nicking the print. And if your press operator is new, a dense sheet with many similar designs invites mix-ups during staging.
The honest rule is this: gang when the job shares a deadline, a garment, and a customer. Otherwise, the handling overhead can eat the film savings.
Frequently Asked Questions
How much space should I leave between designs on a DTF gang sheet?
Around 5 to 8 mm works well for most shops. It gives you room to trim without clipping the artwork and keeps powder from drifting onto neighboring prints. Tighter gaps save film but slow down trimming and raise the risk of edge contamination.
Can I mix different garment colors on one gang sheet?
Yes, the film does not care about garment color. What matters is that all designs on the sheet share the same film type and cure settings. Mixing film types on one sheet is where problems start, because the peel behavior differs.
Does a full gang sheet need a longer cure time?
Often yes. A densely packed sheet holds more heat and has more adhesive to melt, so the center can lag behind the edges. Add a few seconds and check that the powder has a matte, slightly grainy look rather than a glossy sheen before you call it cured.
How do I price small add-on pieces that fill leftover space?
Price them by footprint plus a handling charge for trimming and staging, not by a flat single-sheet rate. Because they ride along on film you were already printing, the material cost is minimal, and the handling charge keeps the labor honest.
Is it worth ganging for a single custom shirt?
Usually not. A one-off has no shared film to spread costs across, so ganging just adds layout time. Save the gang sheet for runs where several pieces share a deadline and a customer.