
When you first hear about DTF printing, it might sound like just another industry acronym. But for anyone who has tried to decorate a dark cotton t-shirt with a detailed, multicolor design at home, DTF printing quickly becomes a game changer. Unlike traditional methods that require weeding, layering, or specialized pretreatments, DTF offers a straightforward path from digital file to wearable art. In this guide, I will walk you through what DTF is, how it works, and what you need to get started. Whether you are a hobbyist or a small business owner, understanding the basics will save you time and money.
What Exactly Is DTF Printing?
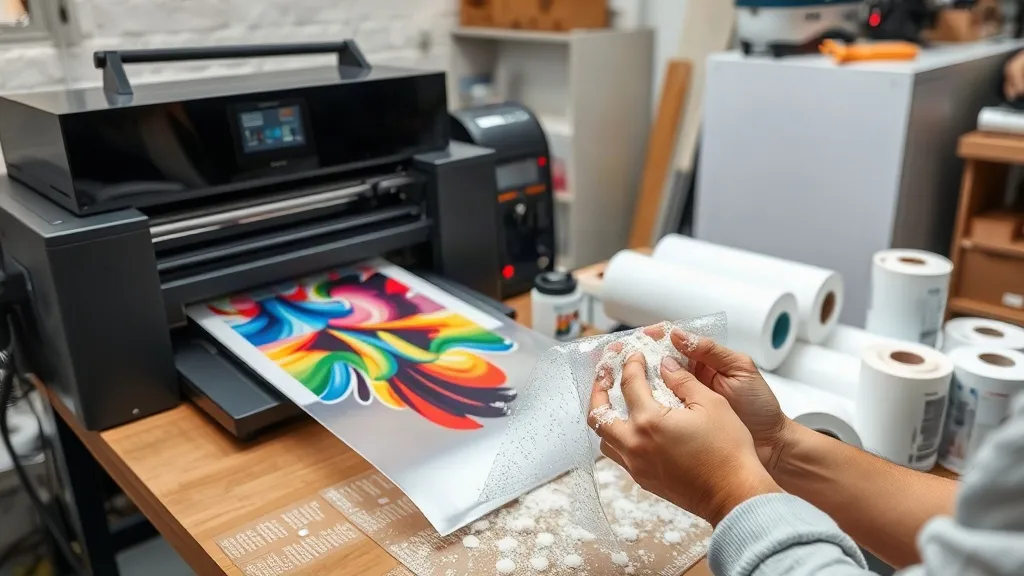
DTF stands for Direct to Film. The process involves printing your design onto a special film using a DTF printer, then applying a powder adhesive to the wet ink while it is still on the film. After the powder is applied, the film goes through a curing stage to melt the adhesive. The result is a transfer that can be stored and later applied to fabric with a heat press. The key difference from DTG (Direct to Garment) is that DTF uses a film intermediary, which opens up a wider range of fabrics and colors.
One of the biggest advantages is that you can print on cotton, polyester, blends, and even some leathers. The transfers are stretchable and durable, making them suitable for activewear and everyday garments. Because the design is printed on film, you can produce intricate details and gradients without the limitations of vinyl cutting.
Why Choose DTF Transfers Over Other Methods?
If you have experimented with heat transfer vinyl (HTV) or screen printing, you know the pain points: weeding tiny letters, mixing inks, or dealing with color limitations. DTF transfers eliminate many of those headaches. Here is why they stand out:
- No weeding required: The printer lays down all colors at once, so you skip the tedious cutting and peeling.
- Works on multiple fabrics: Cotton, polyester, nylon, and more. You are not restricted to a single material.
- Vibrant colors: DTF inks are pigment-based, producing bright, opaque results even on dark garments.
- Durability: When applied correctly, transfers withstand dozens of washes without cracking or fading.
- Cost-effective for small batches: Unlike screen printing, there are no setup fees or minimum orders.
These benefits make DTF a favorite for custom t-shirt shops, sports teams, and promotional product businesses.
Materials and Equipment You Will Need
Getting started with DTF requires an initial investment, but the setup is relatively compact. Here is a breakdown of the essentials:
1. DTF Printer
You can buy a dedicated DTF printer or convert an existing inkjet printer with a DTF ink system. Dedicated printers are recommended for consistent results. Brands like Epson and Roland offer models, but there are also budget-friendly options from Chinese manufacturers. Expect to spend between $1,500 and $10,000 depending on size and features.
2. DTF Inks and Film
DTF inks are specially formulated to work with the powder adhesive. You cannot use regular inkjet ink. The film is typically a PET sheet with a release coating. It comes in rolls or sheets, and you need to match the film to your printer’s feed mechanism.
3. Adhesive Powder
This is the magic ingredient. The powder is applied to the wet ink and then melted. It is usually a thermoplastic polyurethane (TPU) powder. You can find fine, medium, and coarse grades; fine powder is best for detailed designs.
4. Curing Oven or Heat Press
After powdering, the film must be cured. A dedicated curing oven provides even heat, but you can also use a heat press with a lower temperature. The goal is to melt the powder until it becomes glossy.
5. Heat Press for Application
You will need a heat press to transfer the design to the garment. A clamshell or swing-away press works well. Temperature, pressure, and time are critical for a successful bond.
Step-by-Step DTF Printing Process
Now that you have your equipment, let’s walk through the process from start to finish.
Step 1: Prepare Your Artwork
Create your design in a graphic software like Photoshop or Illustrator. Remember that DTF prints are opaque, so you can use white ink as a base. Ensure your design is mirrored if required by your printer’s software. Most DTF printers handle mirroring automatically.
Step 2: Print the Design
Load the DTF film into the printer and send your design. The printer will lay down white ink first (if your design has white), followed by CMYK colors. Some printers also use a varnish or additional white layer for better opacity.
Step 3: Apply Adhesive Powder
While the ink is still wet, sprinkle the adhesive powder evenly over the printed area. You can use a powder shaker or a manual sieve. Gently tilt the film to remove excess powder. You want a uniform coating without clumps.
Step 4: Cure the Powder
Place the film in a curing oven at around 320°F (160°C) for 2-3 minutes, or until the powder melts and becomes shiny. If using a heat press, set it to 300°F (150°C) and press for 30-60 seconds with low pressure. The powder should turn from matte to glossy.
Step 5: Apply to Garment
Preheat your heat press to 325°F (160°C). Place the garment on the press, position the transfer with the design facing up, and press for 15-20 seconds with medium pressure. Let it cool completely before peeling the film. For a softer feel, you can press again for 5 seconds after peeling.
Common Mistakes and How to Avoid Them
Even with the right equipment, beginners often run into issues. Here are some pitfalls and their solutions:
- Insufficient powder: If the transfer peels off after washing, you likely did not apply enough powder or did not cure it properly. Always ensure the powder is evenly distributed and fully melted.
- Wrong temperature: Too hot and the film may curl or the ink may bleed; too cold and the adhesive won’t activate. Use a temperature gun to verify your press.
- Peeling too soon: Wait until the transfer is completely cool. Peeling while hot can stretch the design.
- Poor color vibrancy: This can happen if the white ink layer is too thin. Increase white ink density in your printer settings.
With practice, you will develop a feel for the right parameters.
Applications and Creative Uses
DTF is not just for t-shirts. You can apply transfers to hoodies, tote bags, caps, and even denim jackets. Because the transfers are flexible, they work well on curved surfaces. Some creators use DTF for personalized gifts, such as custom aprons or pillowcases. The possibilities are vast, limited only by your imagination.
Frequently Asked Questions
How long do DTF transfers last?
When applied correctly, DTF transfers can last 50+ washes. Proper curing and following wash instructions (inside out, cold water, no bleach) will maximize longevity.
Can I use DTF on 100% polyester?
Yes, DTF works well on polyester. However, polyester requires lower pressing temperatures to avoid scorching. Test with a scrap piece first.
Do I need a special printer for DTF?
You can convert an Epson printer with DTF ink and film, but a dedicated DTF printer is more reliable and produces consistent results.
What is the difference between DTF and DTG?
DTG prints directly onto the garment, while DTF prints onto a film that is then transferred. DTF works on more fabric types and requires no pretreatment.
How do I store unused DTF transfers?
Keep them in a cool, dry place, away from direct sunlight. Place them in a sealed bag to prevent dust and moisture.
Starting with DTF printing can seem overwhelming, but the rewards are worth it. With a modest setup and a bit of practice, you can produce professional-quality custom apparel from your home or workshop. Remember to source quality supplies and follow the curing guidelines carefully. If you are ready to dive in, consider purchasing a starter kit that includes film, powder, and ink. Happy printing!